 Google Sheets
Learn step-by-step how to read data from a Google Sheet inside of a Kestra flow.
You can use any Google Sheet for this tutorial. In case you do not have Google Sheet, you can:
- Download the data from this link and save it locally as
orders.csvfile. - Create a new Google Sheet.
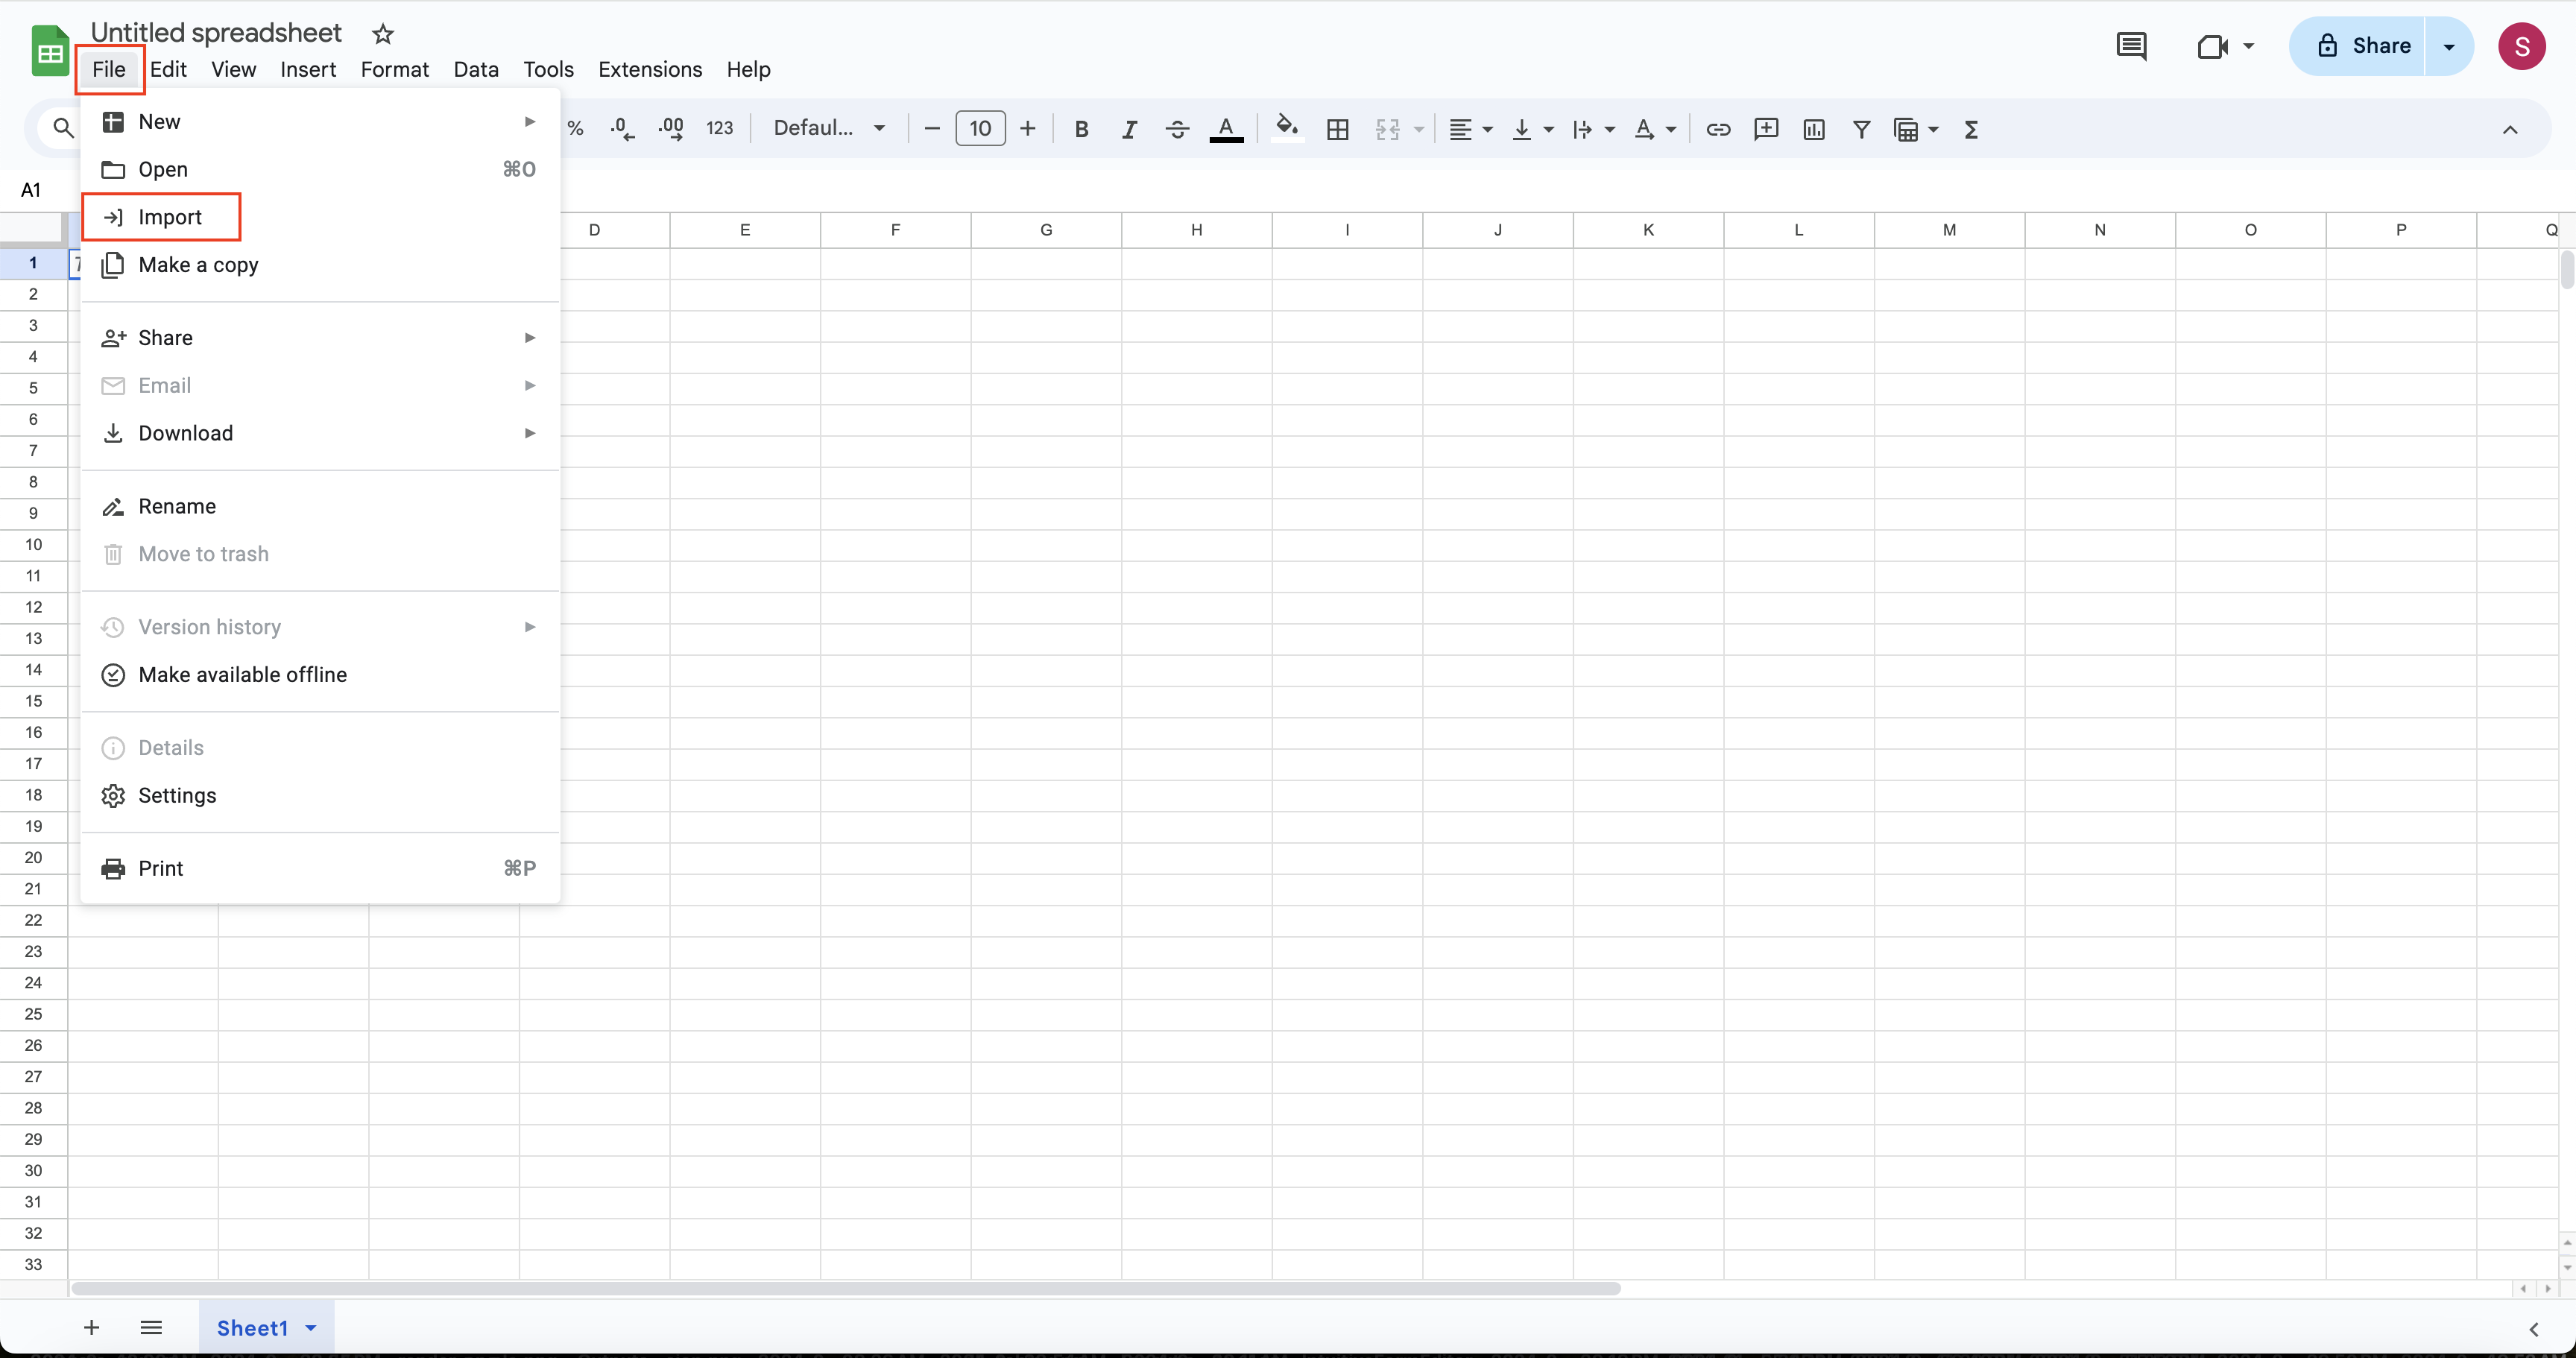
- Navigate to the
Filemenu on the top, and selectImportoption. - Navigate to the
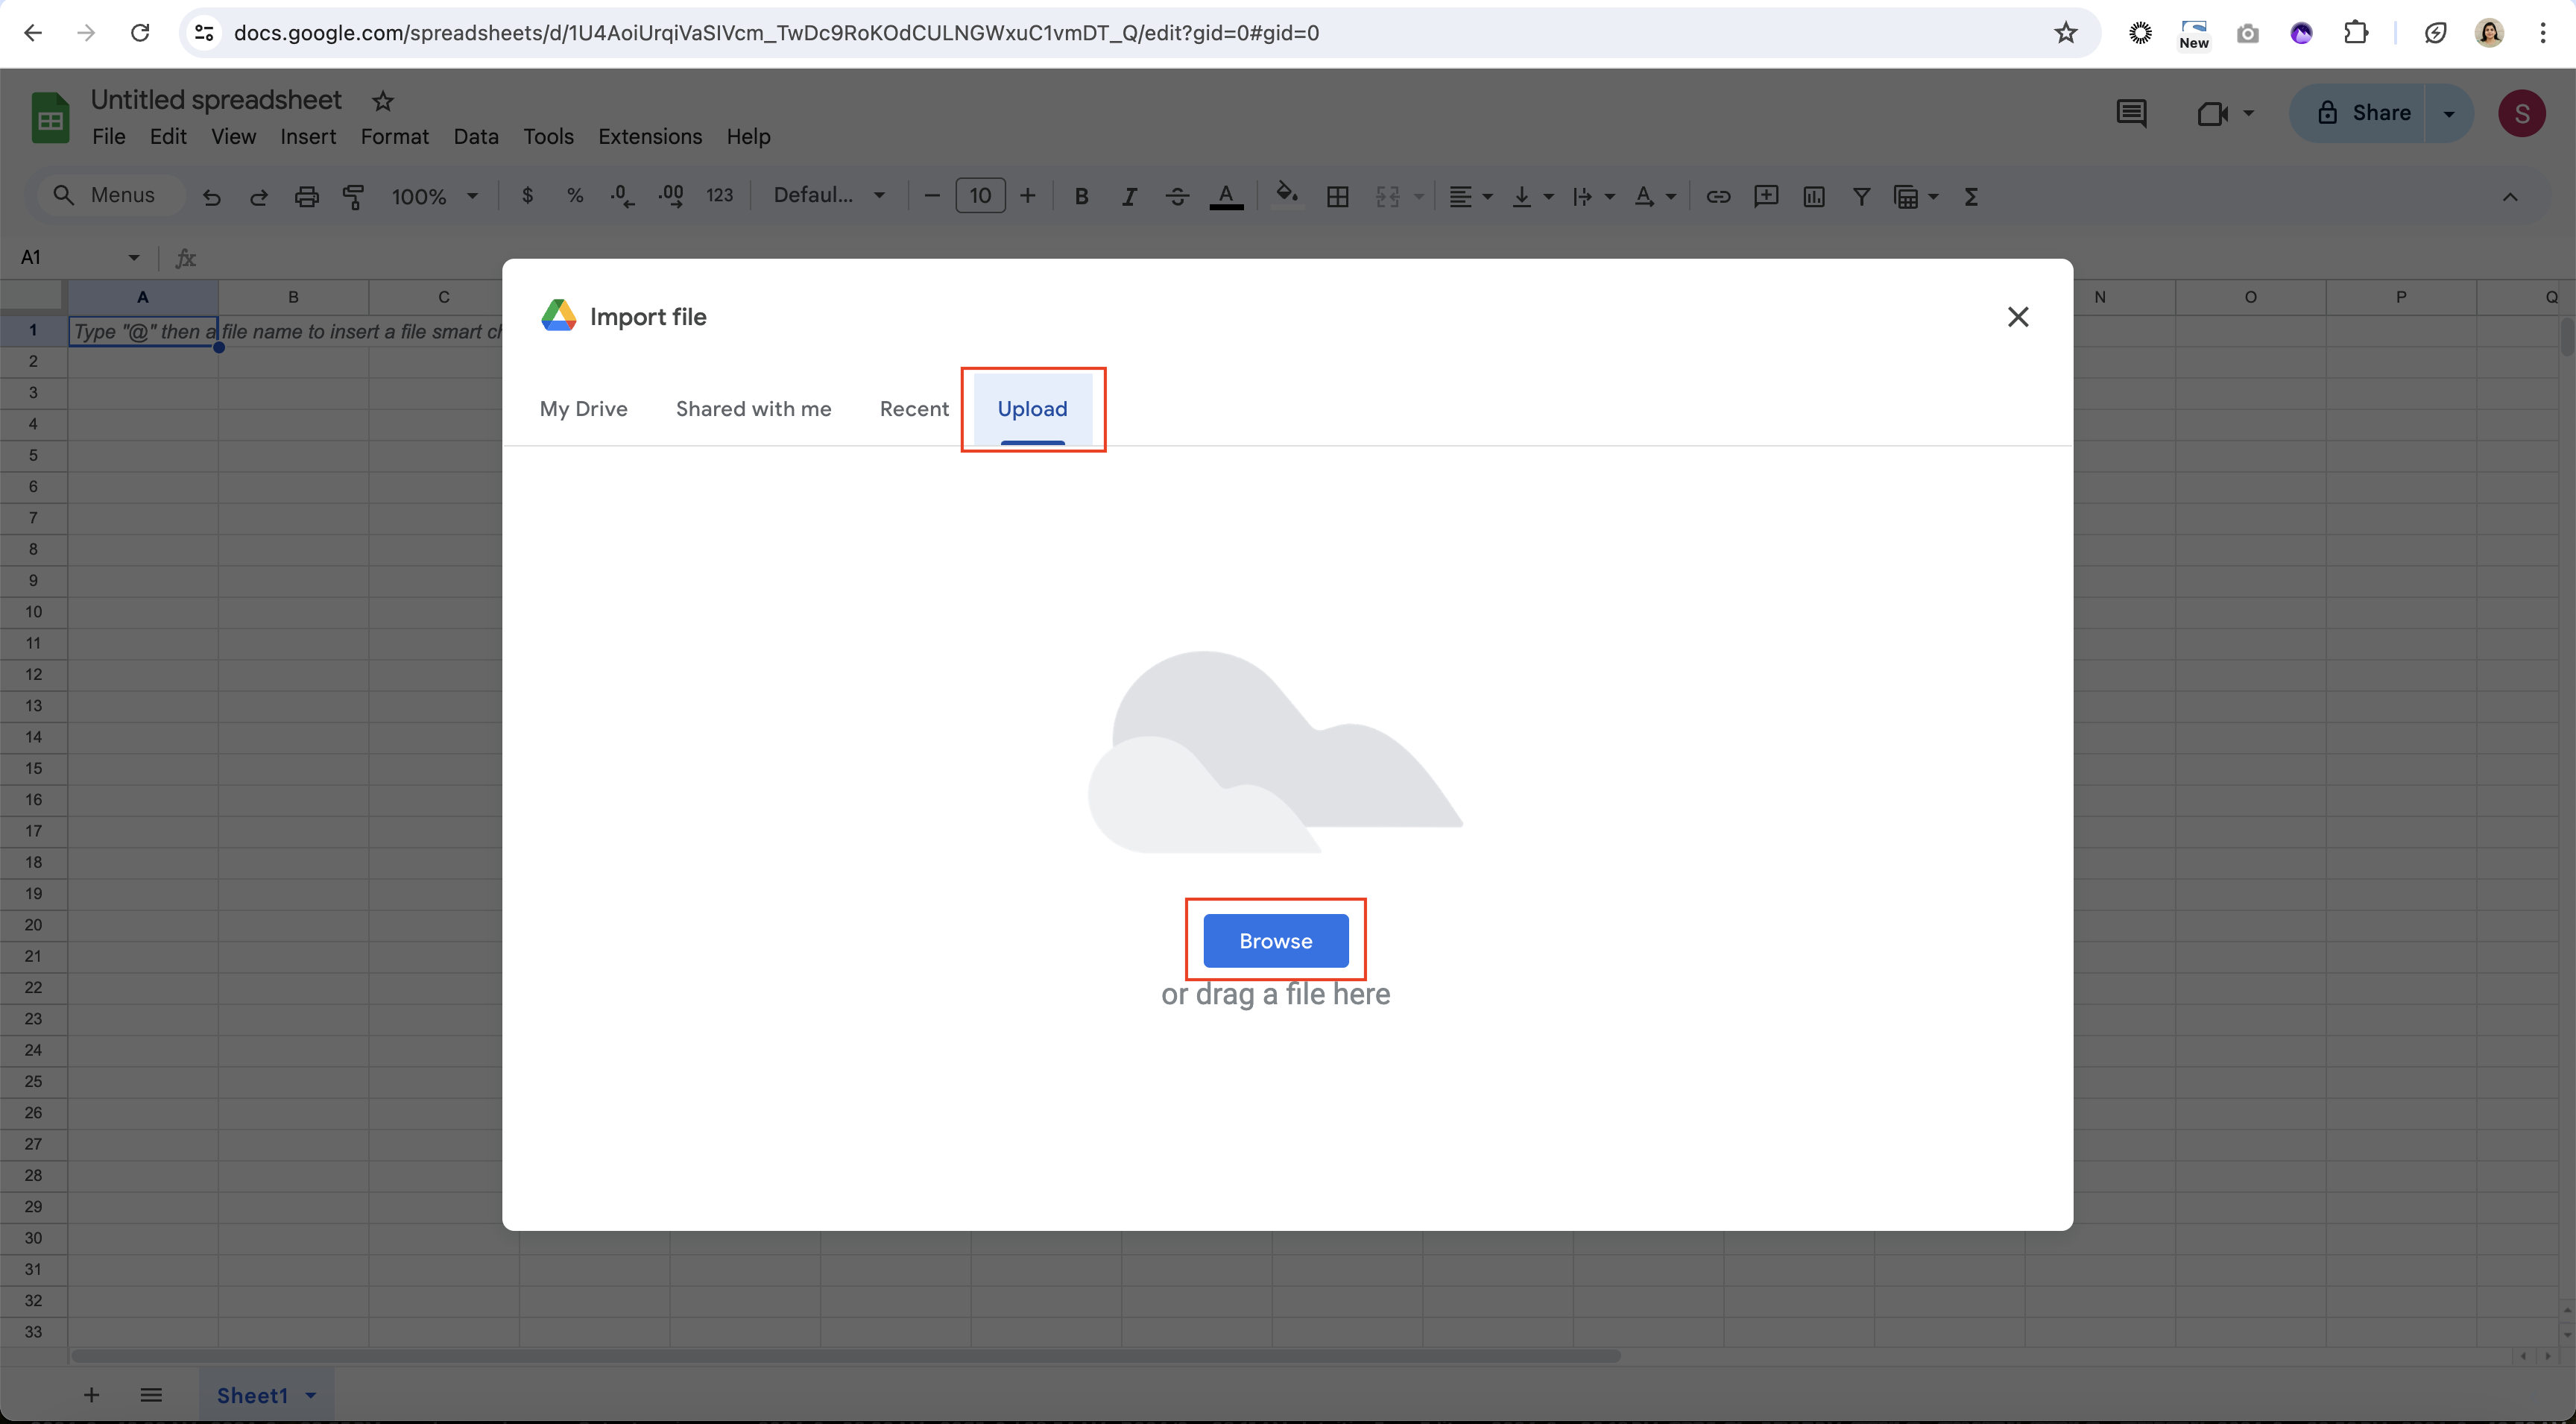
Uploadtab, and click on theBrowsebutton. - Select the recently created
orders.csvfile, and click onOpenbutton at the bottom of the popup. - On the
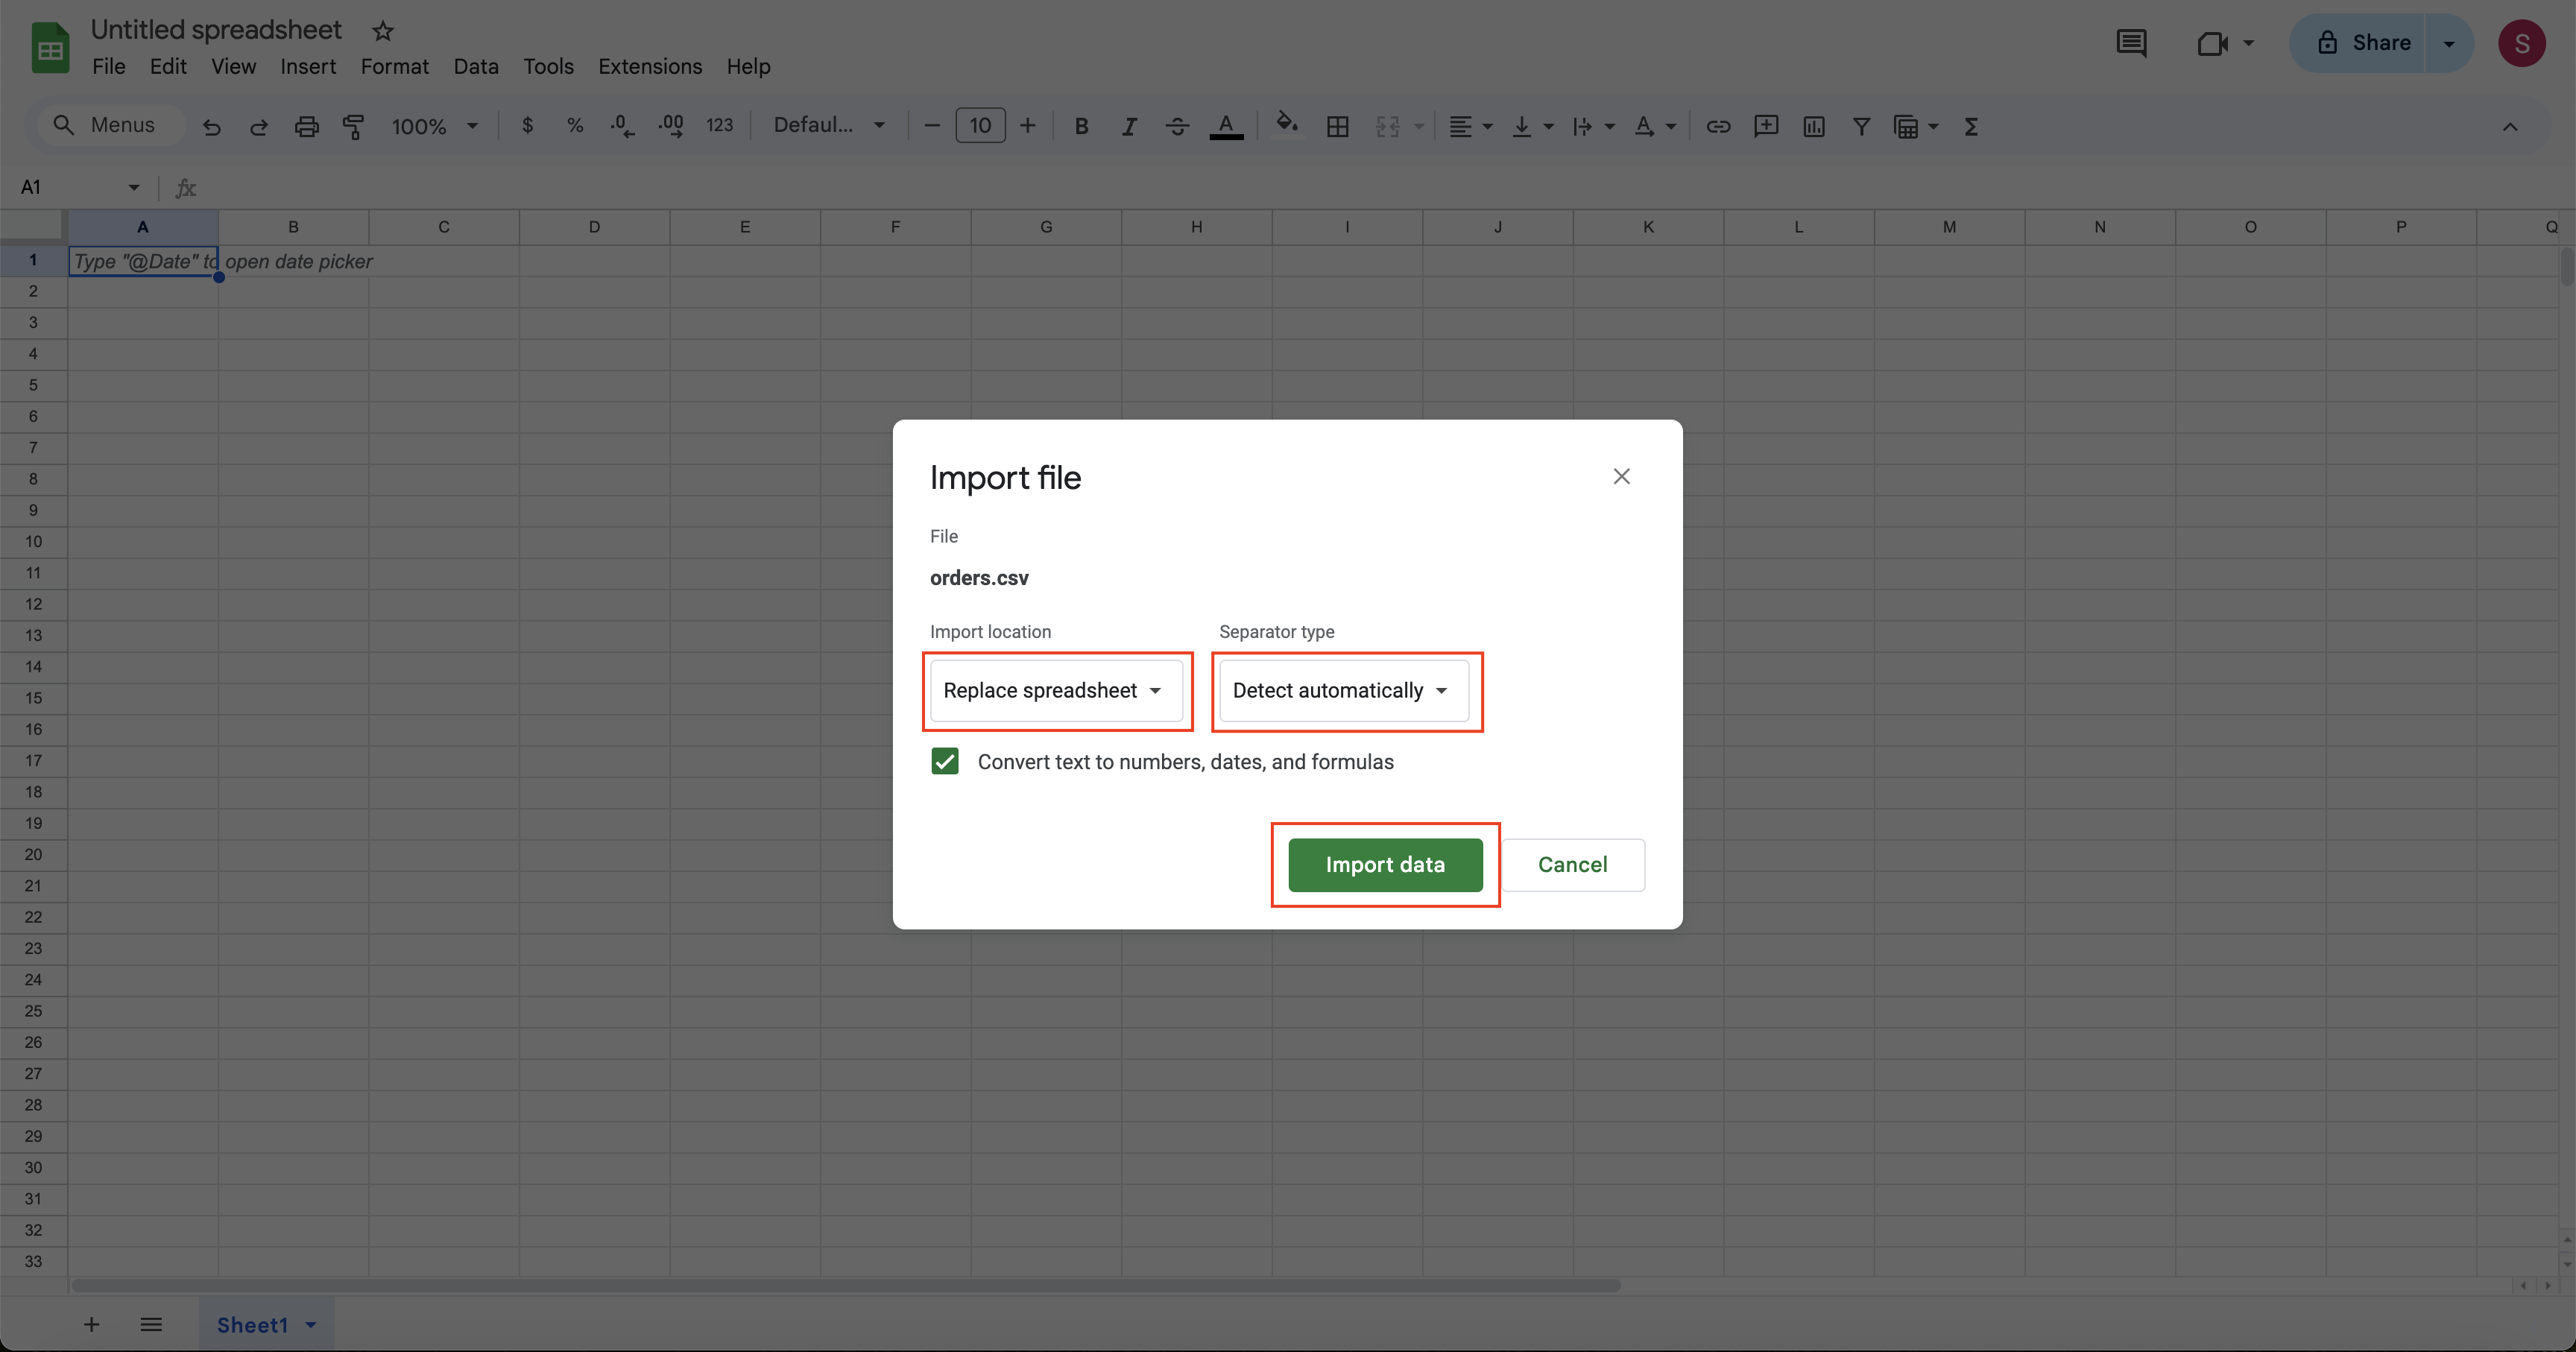
Import filepopup, choose the import location asReplace spreadsheetand separator type asDetect automatically. In this case, it does not matter whether you check or uncheck the boxConvert text to numbers, dates, and formulas. Click onImport databutton. - The contents of the file will be populated in the spreadsheet.
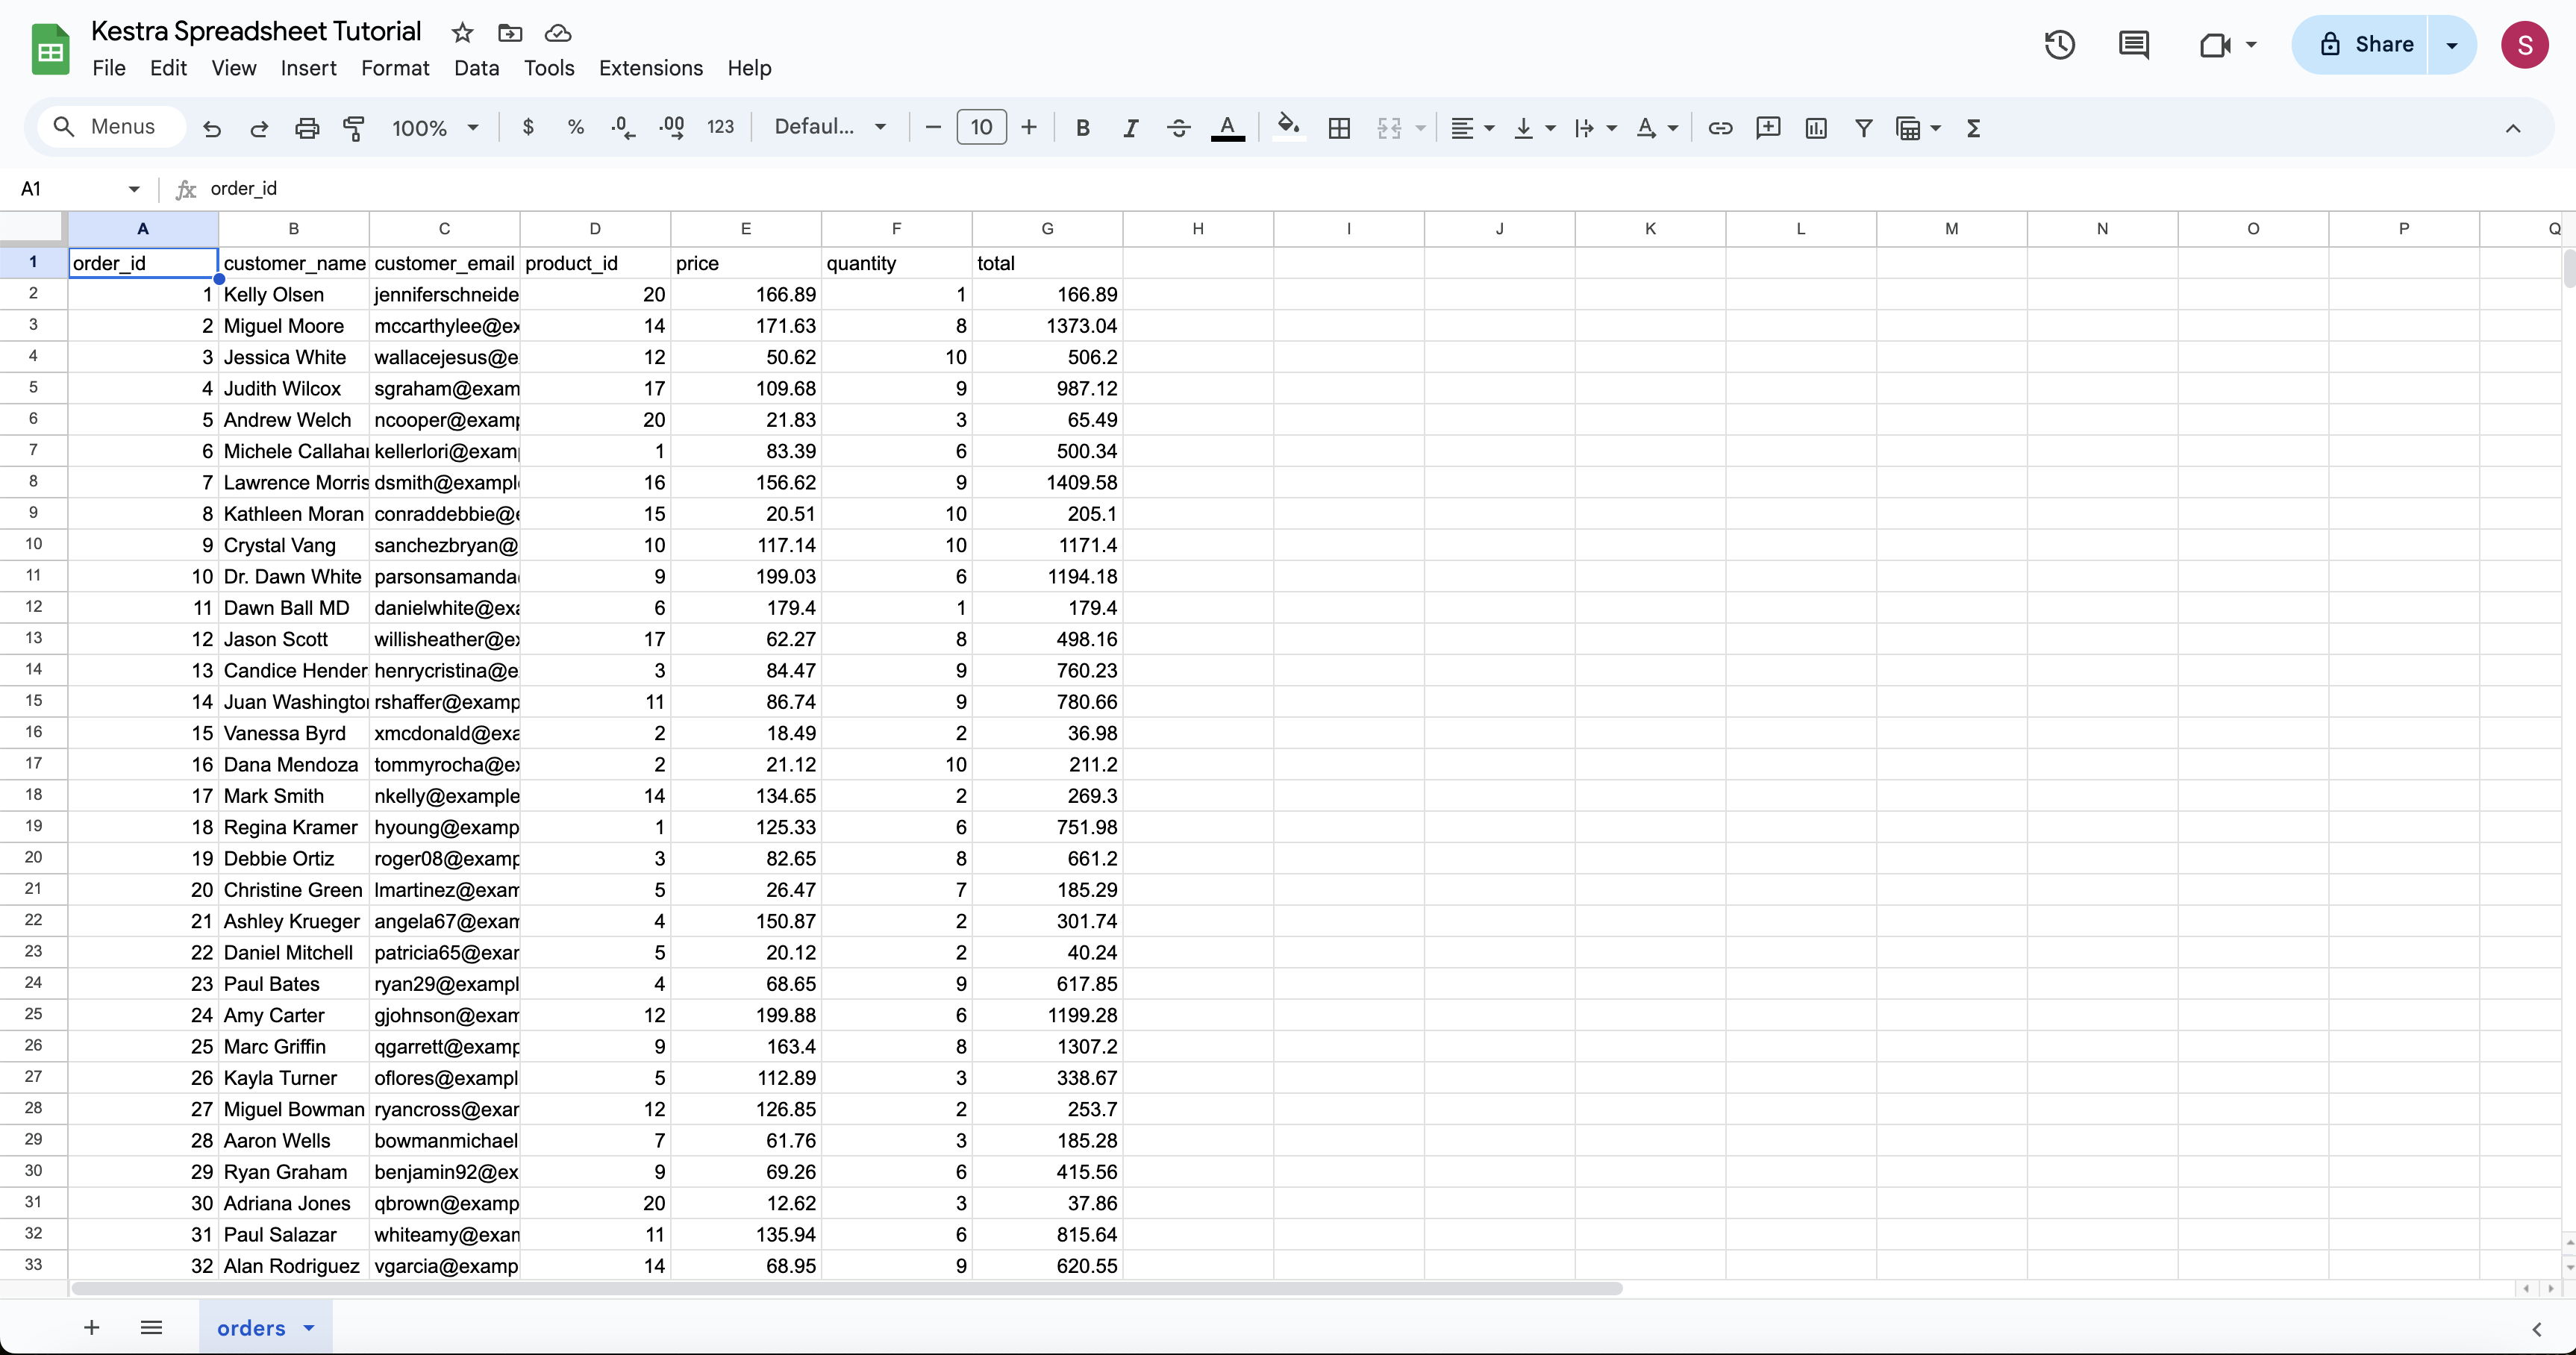
- You can put an appropriate title to the spreadsheet, and name the sheet containing the order records as
orders.
Now that we have the spreadsheet ready, let us proceed to assign appropriate authorization for the spreadsheet. For this:
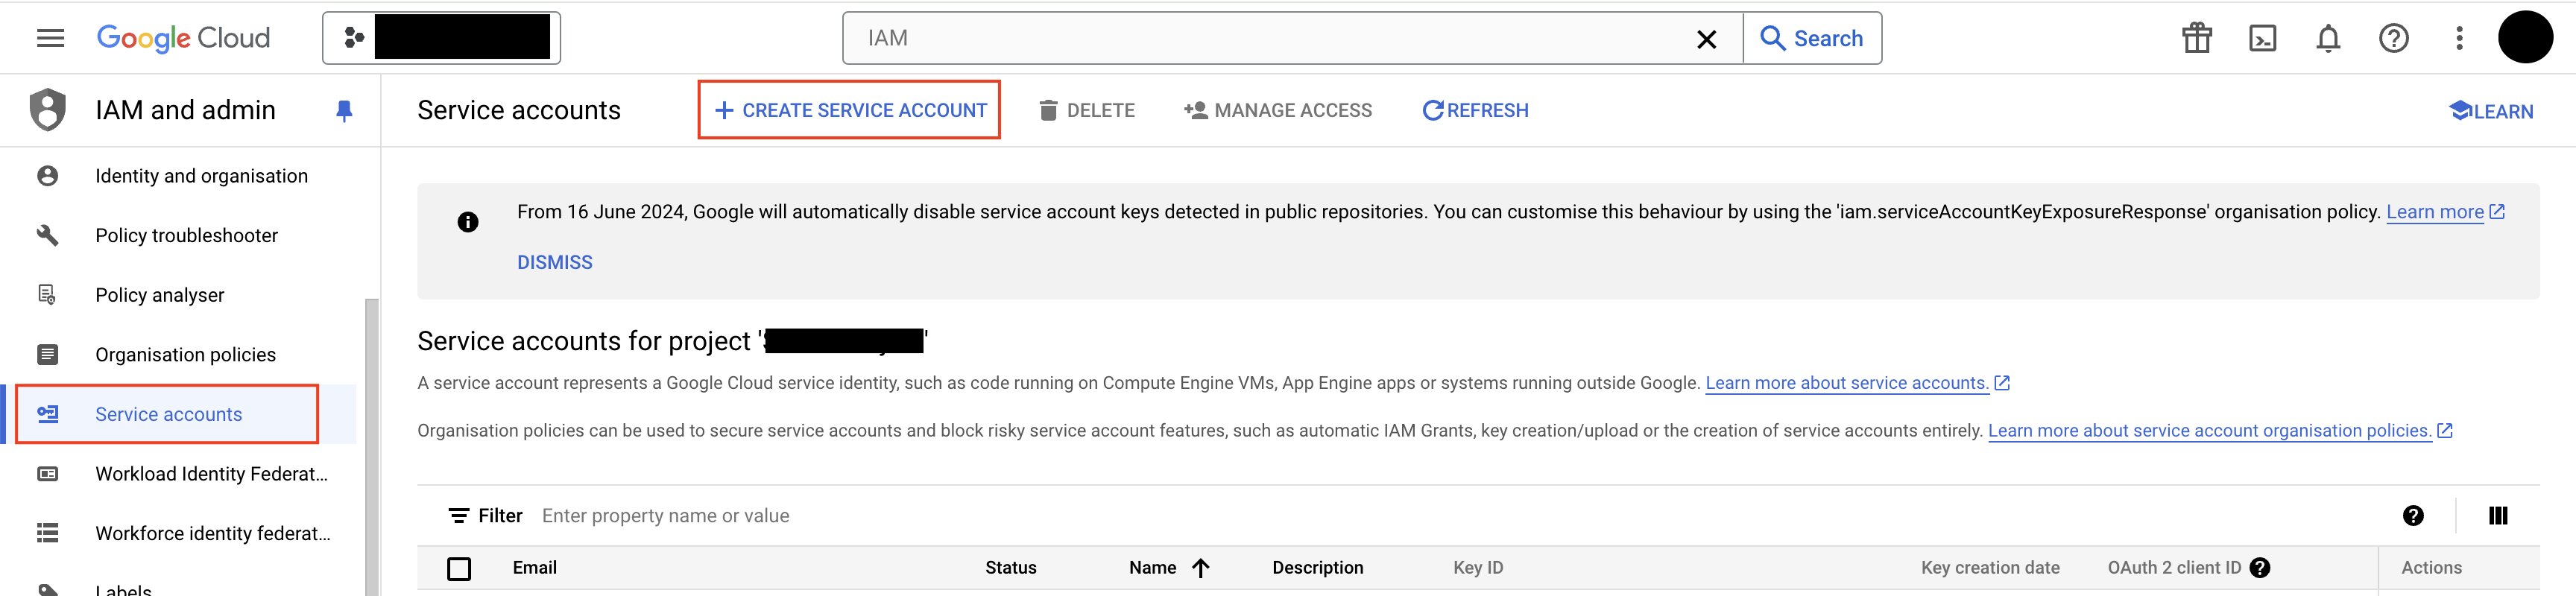
- Go to the GCP console, navigate to the IAM service.
- Select
Service accountsfrom the left navigation menu. - Click on
Create Service Accounton the top. You may choose to use an existing service account in which case you can skip the next step. - Put in appropriate service account name, service account id (the auto-populated value should be good to start with) and service account description, and click on
Done.
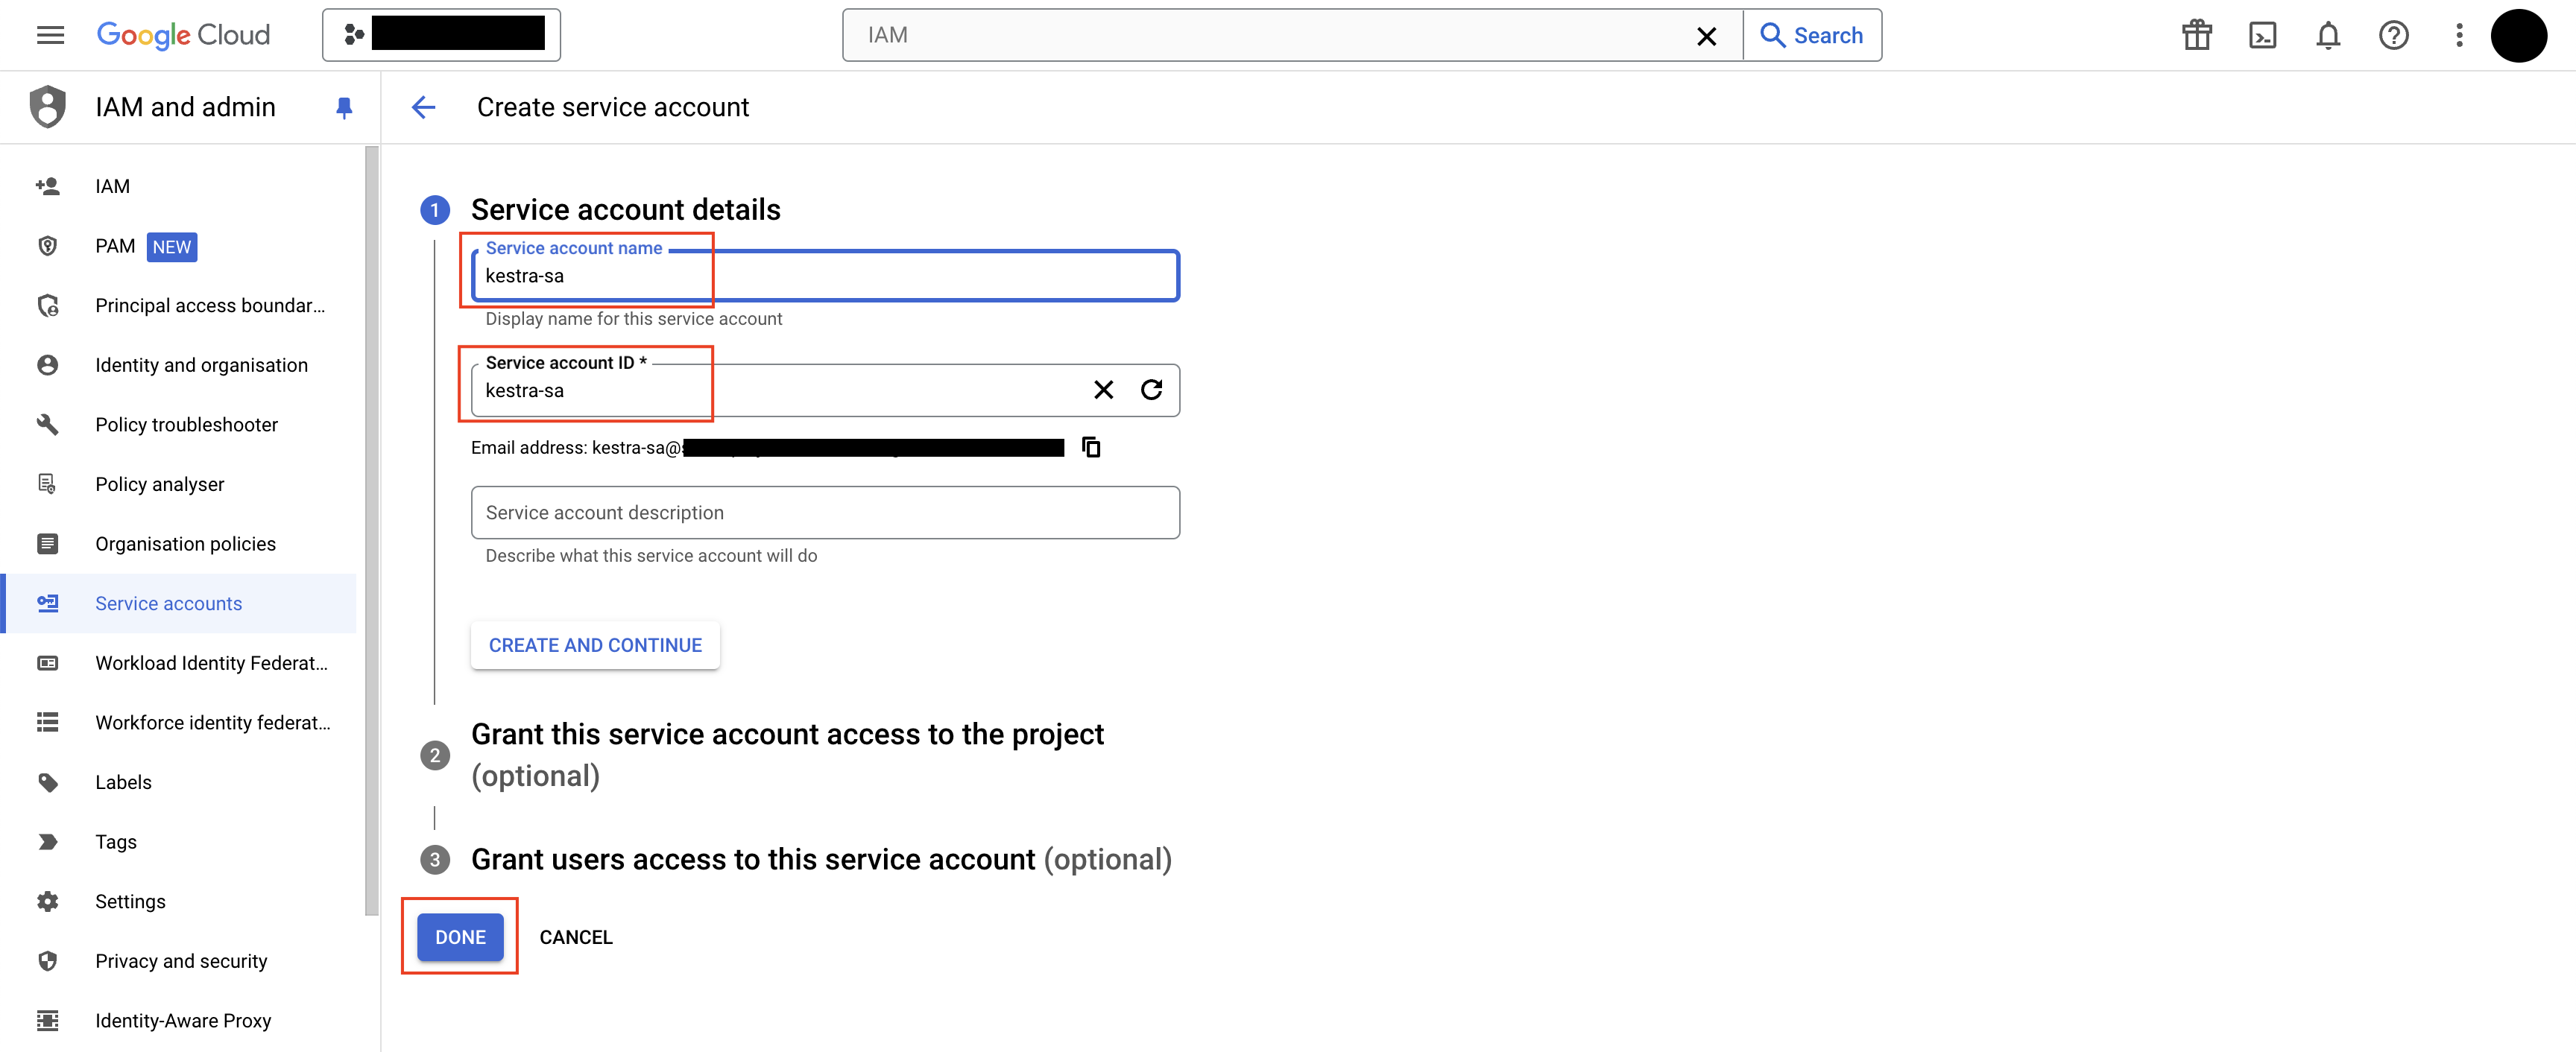
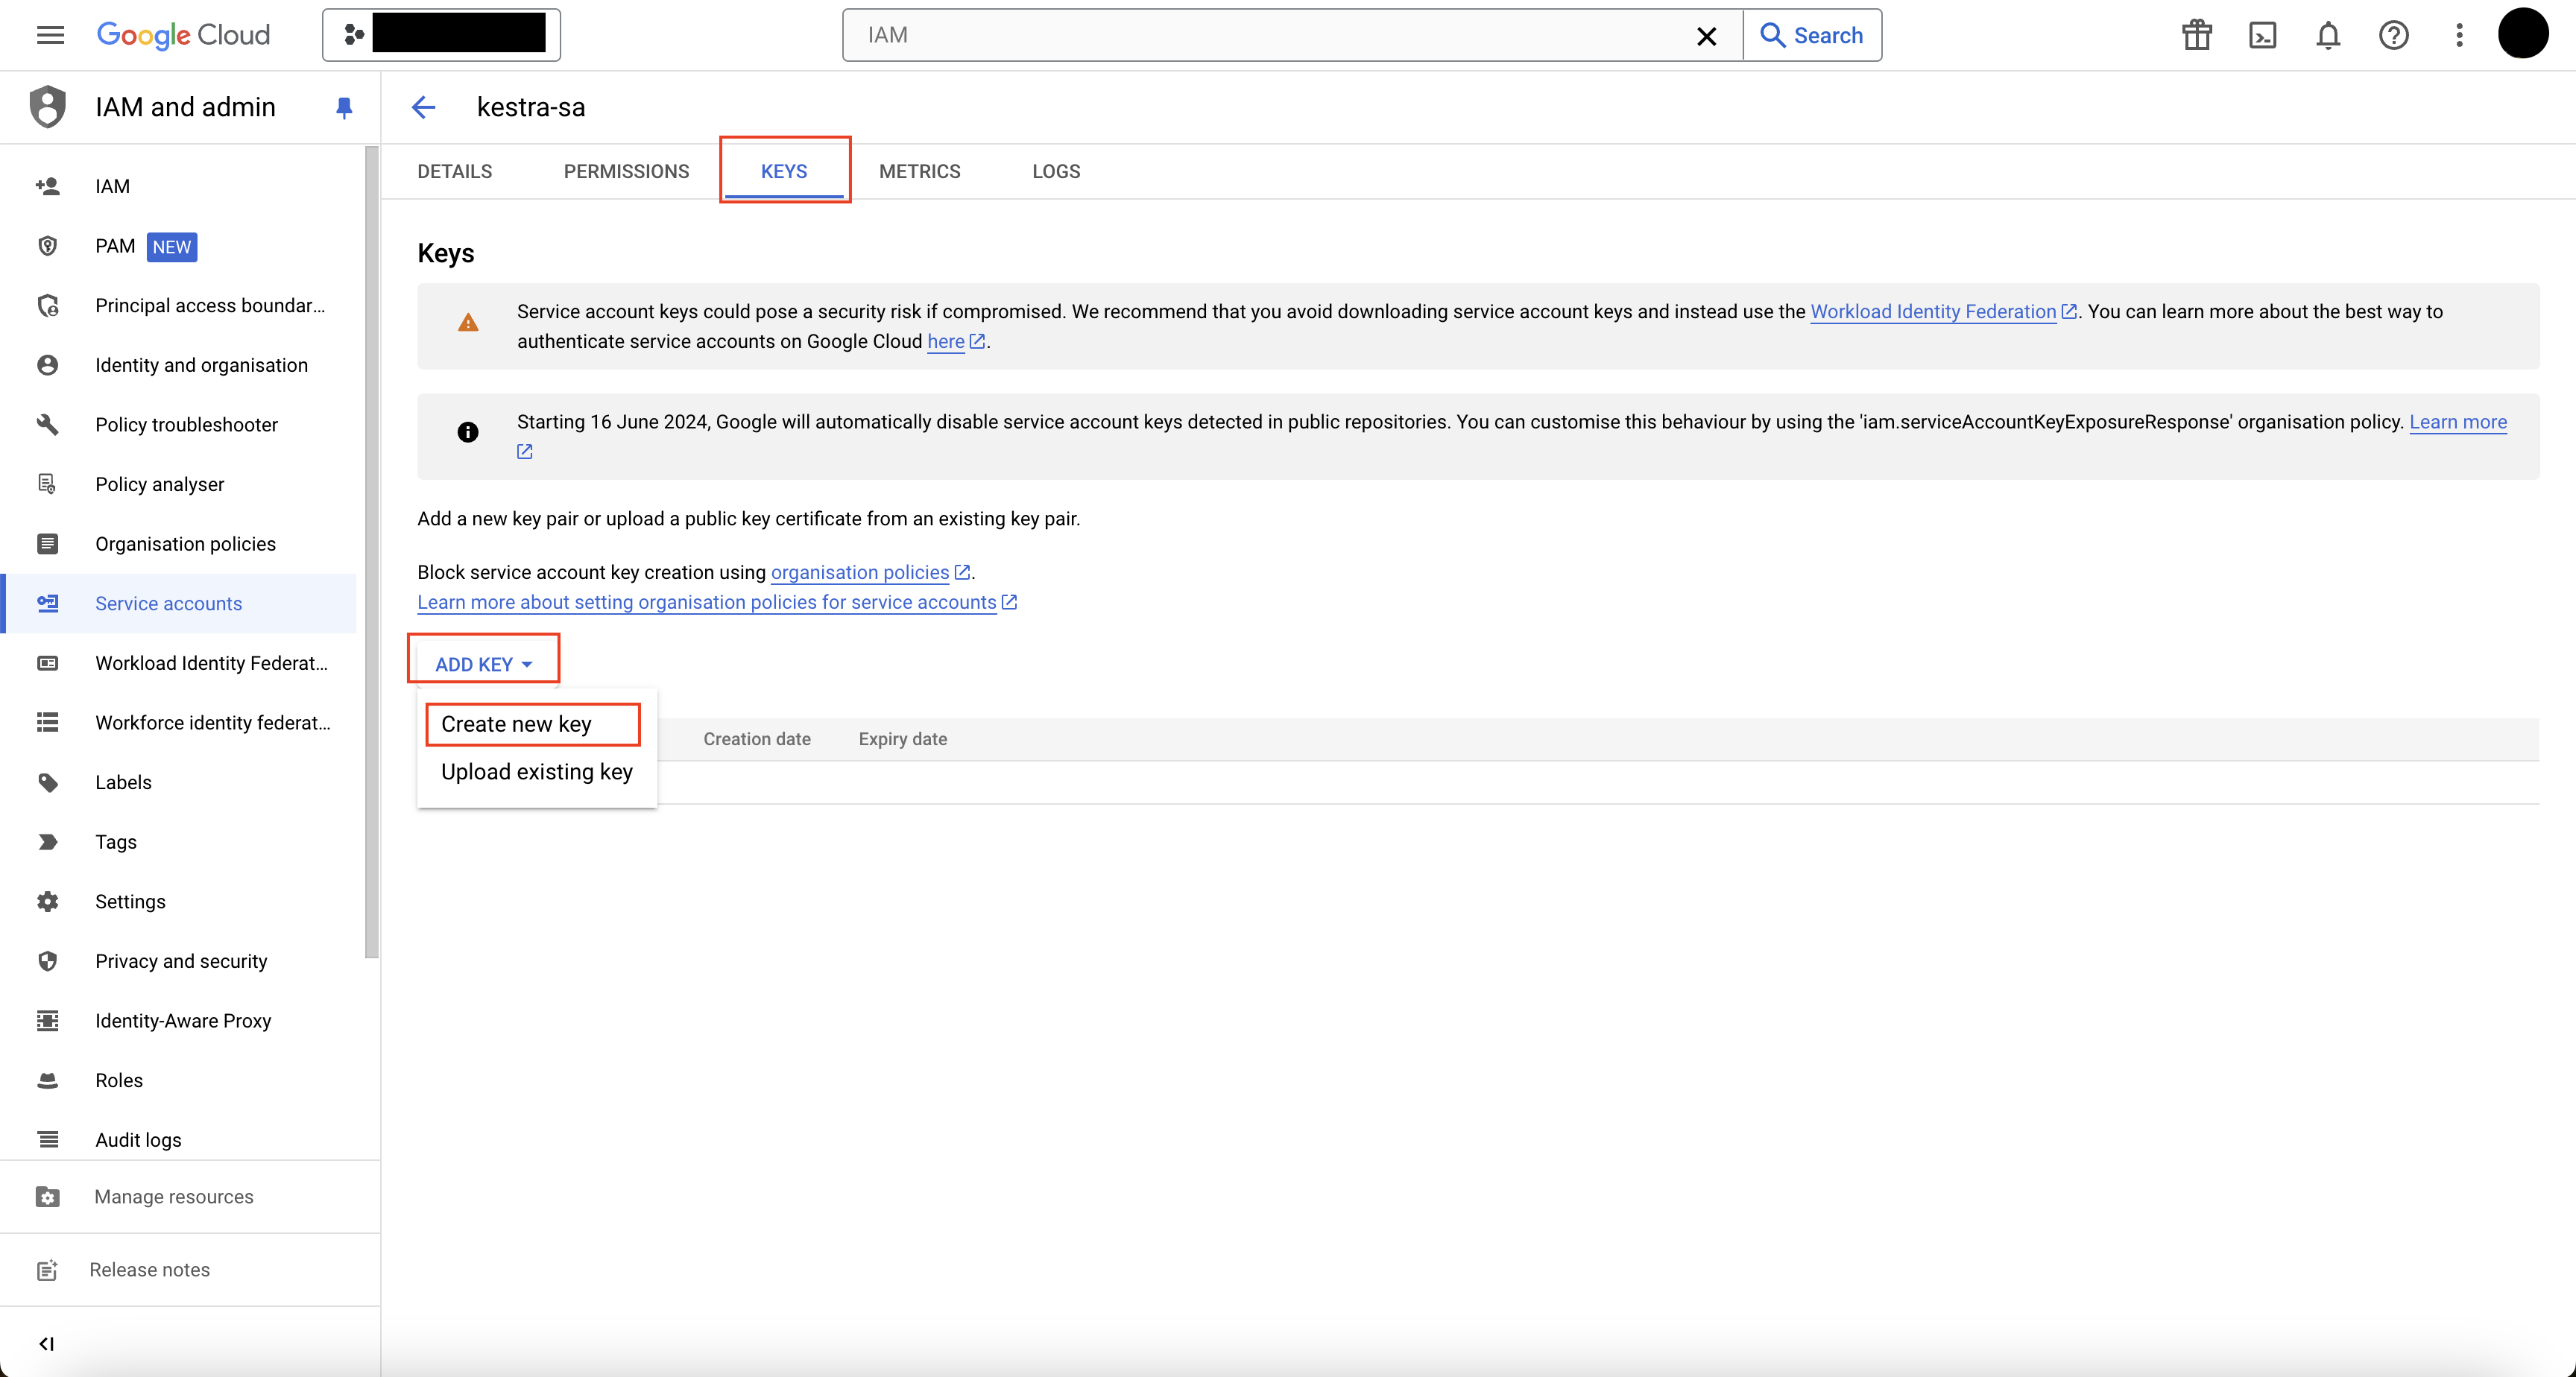
The new service account has been created. Let's add a key to the service account.
- Click on the corresponding service account from the Service Accounts page.
- Navigate to
Keystab, and click onAdd Key->Create new key. - On the
Create private keypopup, selectJSONoption, and click onCreate. - This will download the service account JSON file on your local computer.
- Provide this JSON file's content as the secret.
a. With Kestra EE, provide the secret key
GCP_SERVICE_ACCOUNT_JSONand the file contents as the value. b. For docker-based Kestra instance, convert the JSON file's contents into base64 encoded format usingcat <private_key_file>.json | base64and then provide the secret value as part of the environment file to the docker instance:SECRET_GCP_SERVICE_ACCOUNT_JSON=<base64_encoded_value_for_json_file_contents>.
Detailed instructions on creating service account can also be found here.
We will now provide access to the spreadsheet for the service account.
- Copy the email corresponding to the service account from the Service Accounts page.
- Go to the spreadsheet, and click on the
Sharebutton on the top right. - Add the service account email in the
Add people, groups, and calendar eventstext box. - You can give the
Vieweraccess to the service account. - Click on
Done.
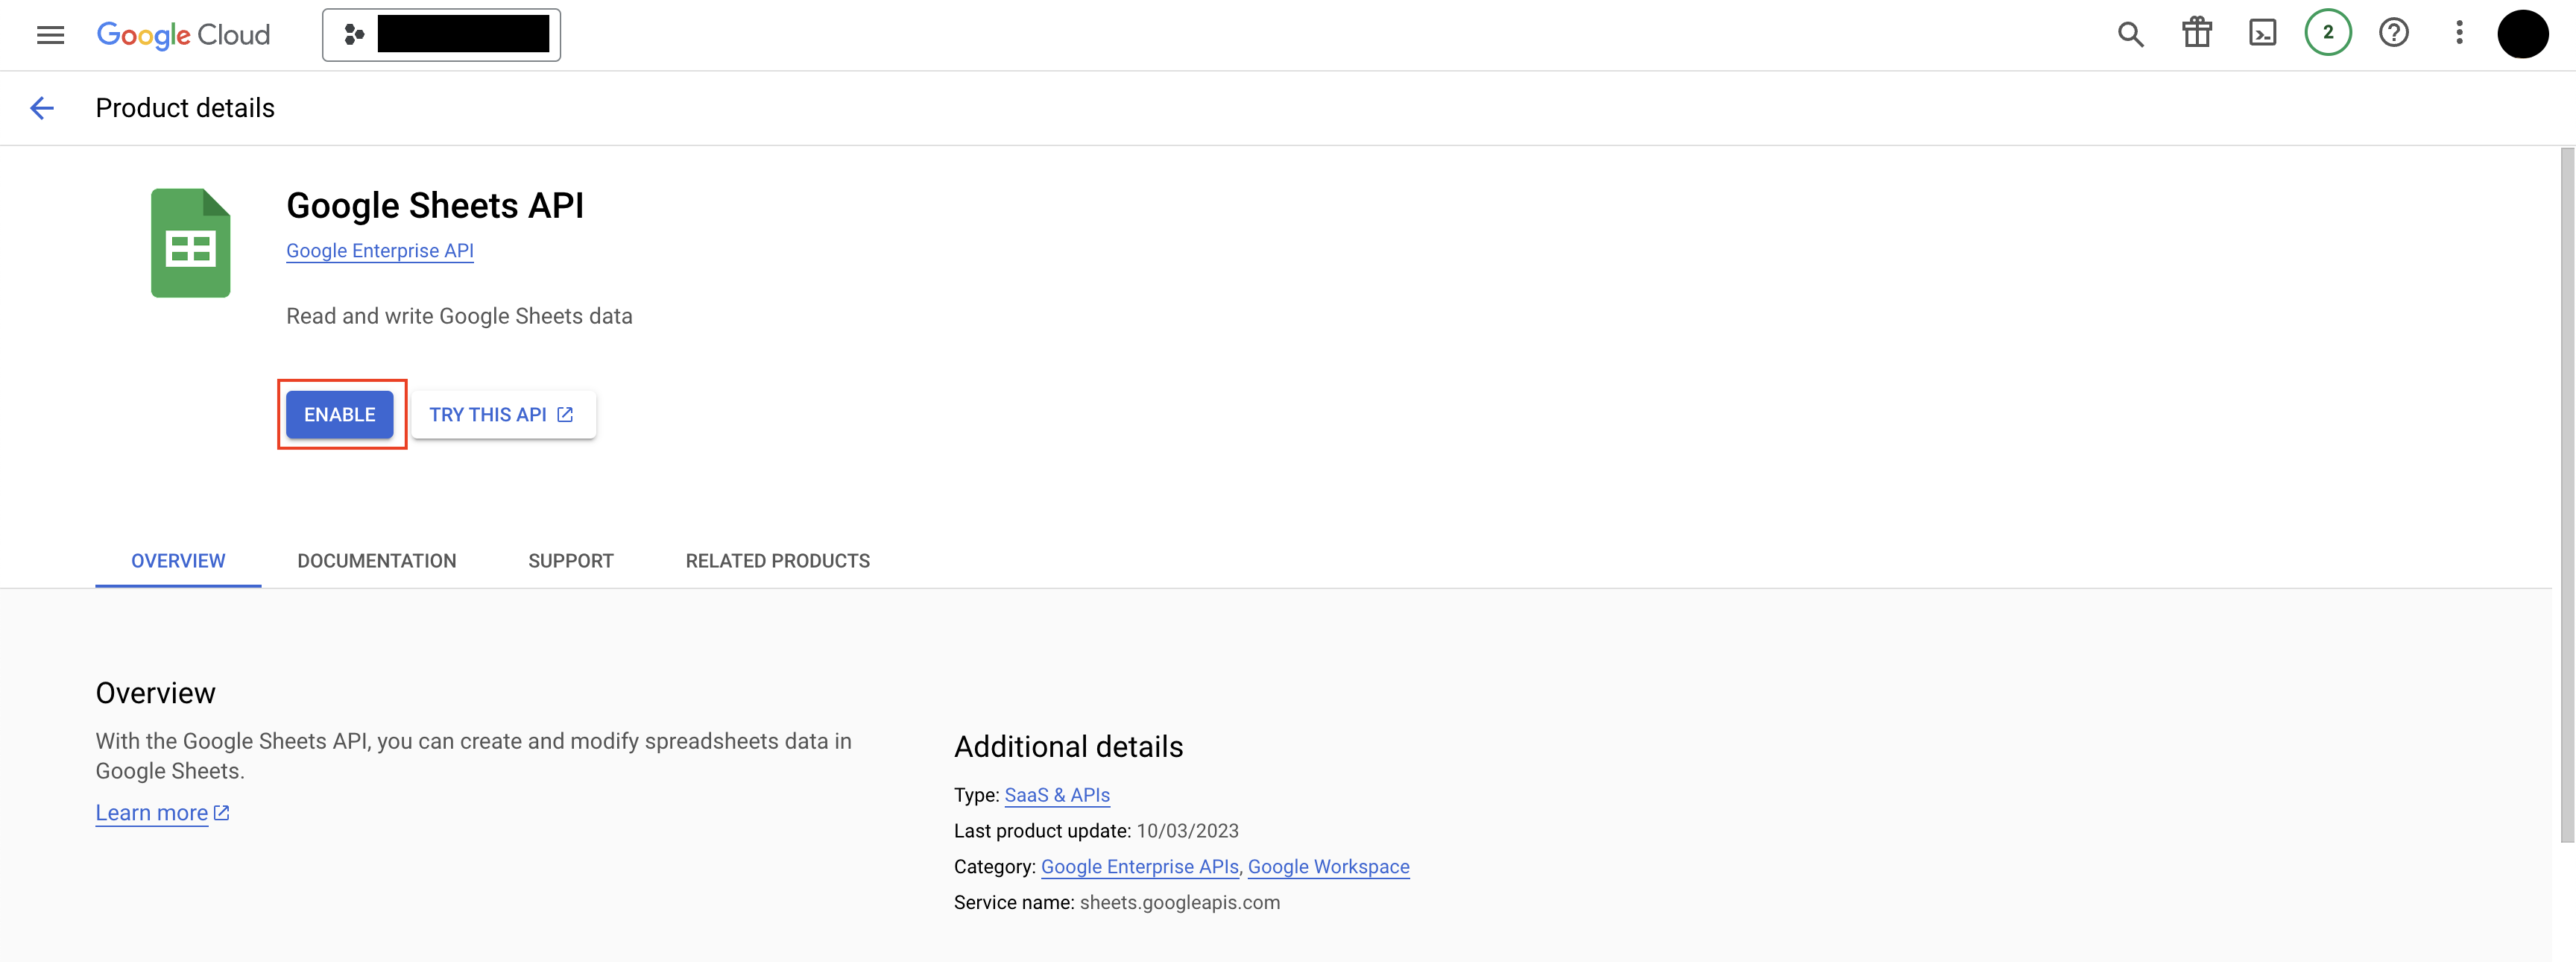
Let us now enable the Google Sheets API in the GCP console.
- On the GCP console, search for
Google Sheets APIservice, or directly navigate to one using this link. - Check whether the Google Sheets API is already enabled. If not, you will see an
Enablebutton on the page. Click on theEnablebutton.
With this, we are all set to access the Google Spreadsheet from Kestra flow. Here is an example of how the Kestra flow might look like:
id: gsheet
namespace: company.team

tasks:
  - id: read_gsheet
    type: io.kestra.plugin.googleworkspace.sheets.Read
    description: Read data from Google Spreadsheet
    spreadsheetId: "1U4AoiUrqiVaSIVcm_TwDc9RoKOdCULNGWxuC1vmDT_A"
    store: true
    valueRender: FORMATTED_VALUE
    serviceAccount: "{{ secret('GCP_SERVICE_ACCOUNT_JSON') }}"
    header: true
The spreadsheetId in the flow is the ID that is present in the spreadsheet URL. For the URL https://docs.google.com/spreadsheets/d/1U4AoiUrqiVaSIVcm_TwDc9RoKOdCULNGWxuC1vmDT_A/edit, the spreadsheetId will be 1U4AoiUrqiVaSIVcm_TwDc9RoKOdCULNGWxuC1vmDT_A.
The store : true implies that the values read from the spreadsheet will be stored as a file in the Kestra's internal storage. In case, you only want to fetch the result, and not store them as a file in the Kestra's internal storage, you can use fetch: true instead.
The serviceAccount value is fetched from the secret store, and its value is the service account key's JSON file contents.
The header: true implies that the first line of the input contains the column headers.
In case you only want a few selected sheets to be read, you can provide the array of sheets as part of the attribute selectedSheetsTitle as follows:
selectedSheetsTitle:
  - orders
  - products
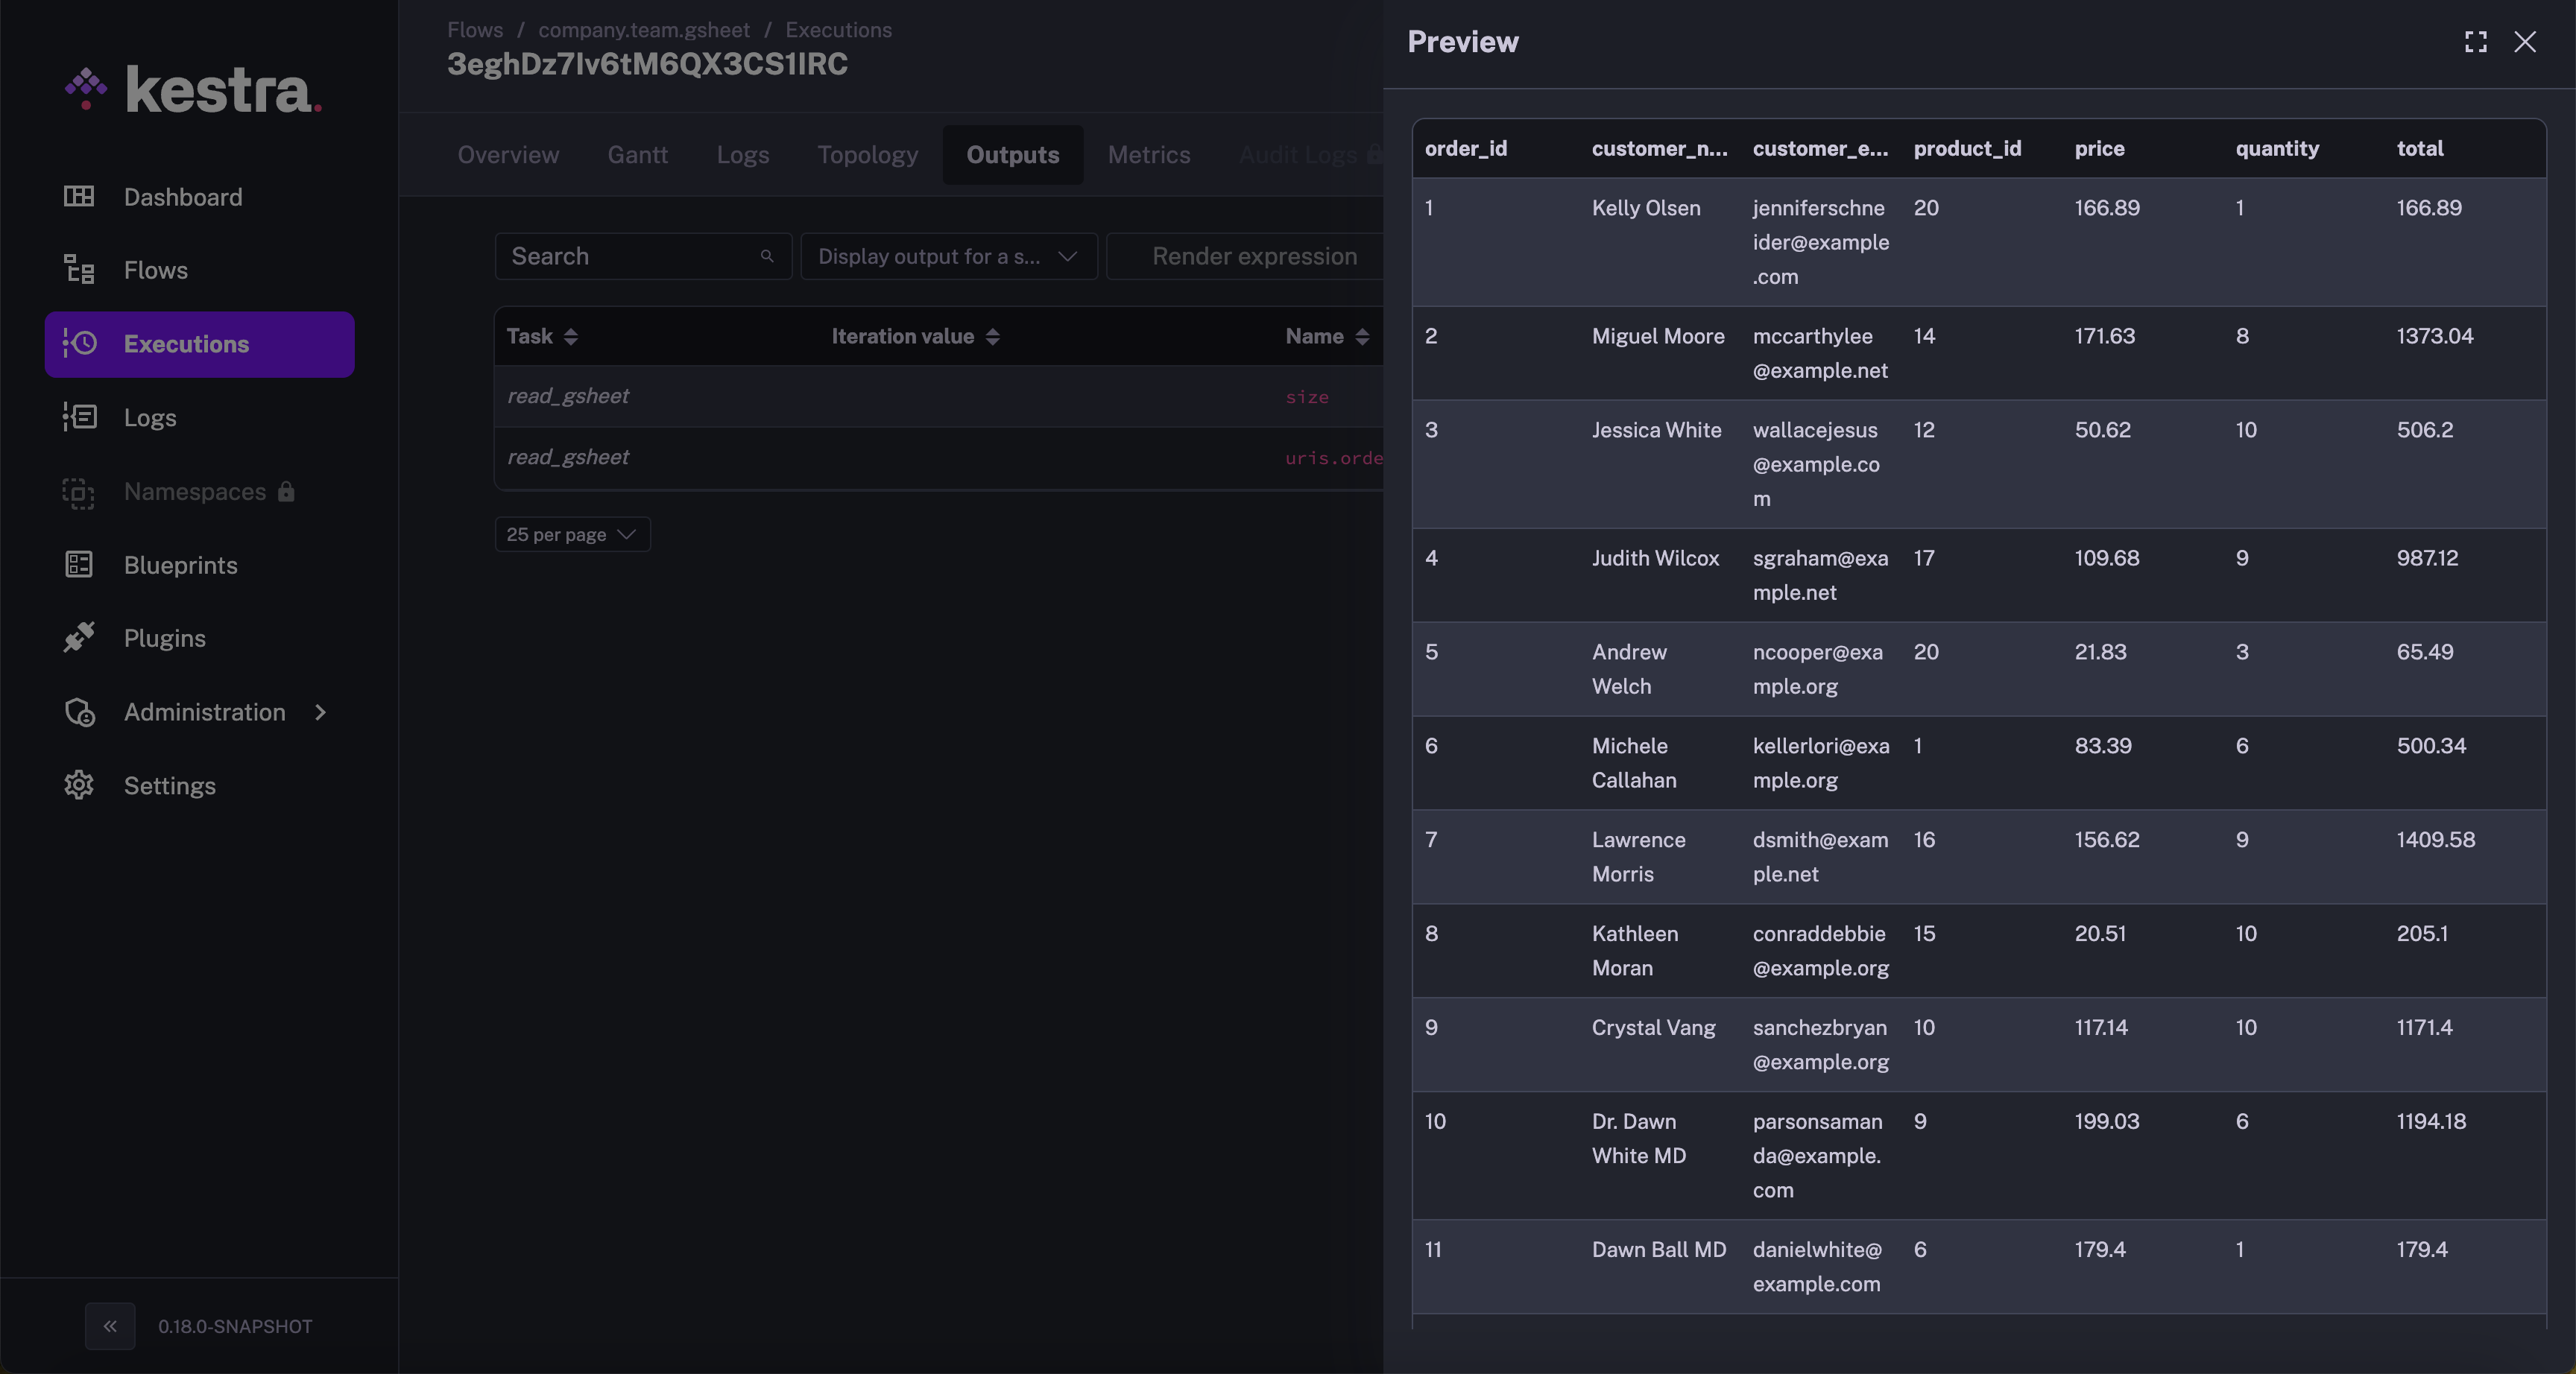
Here is the output of executing the above Kestra flow:
This is how Kestra's Google Workspace plugin can be used to read the spreadsheet with its Sheet's Read task.
Was this page helpful?